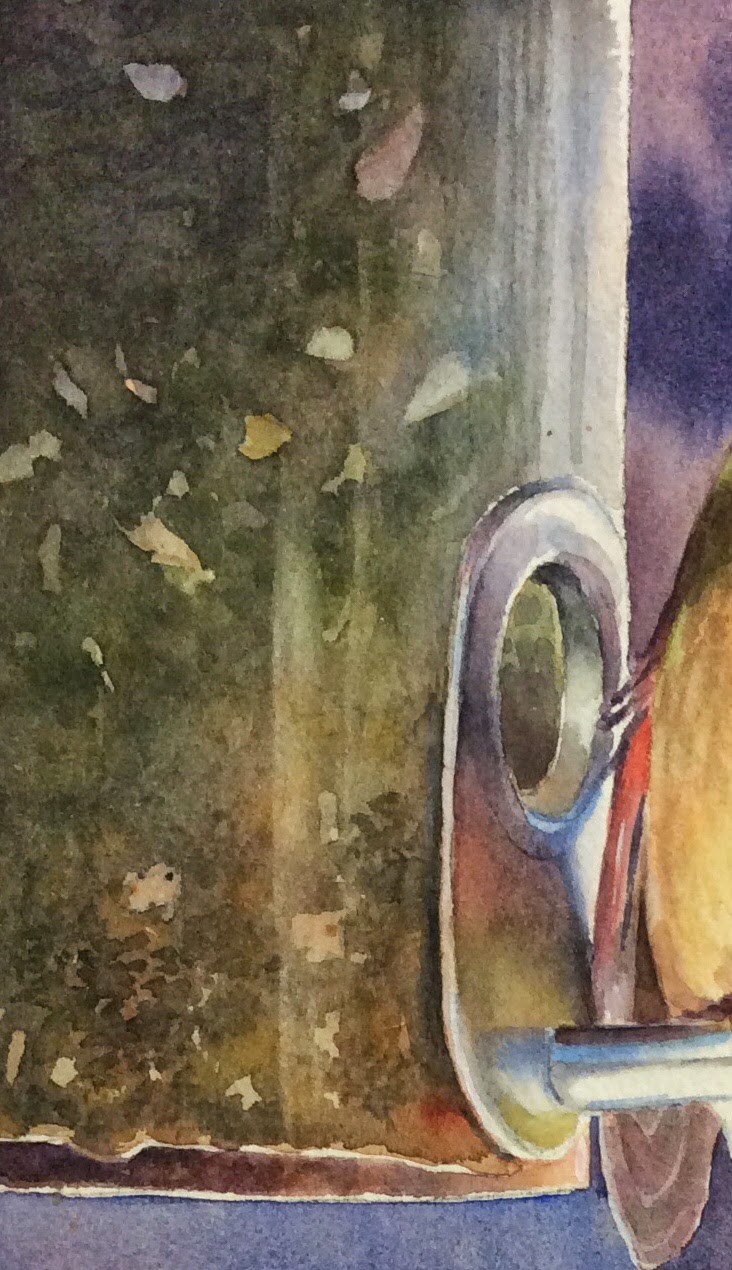
The bird feeder was a little tricky to figure out. I decided a few layers was necessary to achieve the depth and variety of the seeds. I started by drawing in a few larger seed shapes but didn't overdo it....around 7-9 shapes. Then I wet the whole area but not the seeds I just drew in, or the metal hole area, and not the very bottom where there is a white dividing line. Also I stopped with the water at the very right edge to keep the white highlight. Using burnt sienna, I painted the upper portion and stopped 3/4 of the way to the right and used a light wash of cobalt blue the rest of the way towards the right where there are highlights on the plastic....leaving the unwet area alone to keep the white highlight. Towards the bottom, it gets a little more golden, so I laid in some raw sienna with burnt sienna in parts. I even put a little cadmium red in the lower right corner. After that dries, I painted the seeds I drew in with various colors, some raw sienna and some burnt sienna and one or two I made cobalt. I let that dry and worked on the NEXT LAYER. This time working wet on dry I got a little stronger with my color. I introduced the olive green color I used on the bird....the sap green mixed with a little maroon perylene. I started painting with the green mixture at the top corner and used negative painting to add in more seed just very randomly so that the underlying color would remain and create the seed color. Again don't go overboard, the brain will be able to tell this is bird seed and you definitely shouldn't try to over work this or add every seed shape! Insane! Keep it simple. As I worked toward the right I started to add in the cobalt again but kept that green in it too. The blue shows up subtly. I kept working the green color all the way down, also introducing raw sienna again towards the bottom.
LAST LAYER - (don't forget to let each layer dry before doing the next one) I used the same green, only I introduced neutral tint to it. I wanted the seed to look more black, but the black was too strong so I mixed the green into it to soften it down. It seemed to do the trick. Again, I tried to paint with a little texture, showing a little of the background I used before....it should be subtle changes in color, not too obvious. Subtle is good! Some areas I painted a little stronger than others. The upper left seems a little darker so I used stronger color there. I painted over the bird seed I drew in to glaze it and make it recede a little, but here I diluted my black mixture a bit so as not to completely lose the seed shapes altogether. I kept using the black mix all the way through, except I did keep putting a little cobalt into the right and if it needs a little browner touch towards the bottom, you can add more raw sienna, cadmium, or burnt sienna charged into the black.....however you see it. Just don't make the black mix so heavy towards the bottom. We are going to add more when it dries.
Now that it's all dry, I used that same black mix and dappled some little seeds on the bottom because the smaller seeds fall to the bottom of the feeder and it is evident in the photo. There are some lighter seeds in there too....you can dapple some raw sienna in there too. That has to dry, and then I added highlights by scrubbing out vertical lines with water and blotting. Remember subtle is good here.